
DAY 8
Building an Apple Pie Dinghy
DAY 8 of building the Apple Pie Dinghy tender for my Tanzer 22.
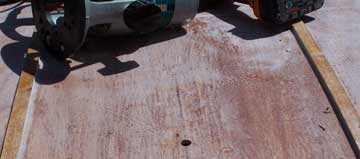
Took a break from sanding to open up the daggerboard hole. First a hole was made
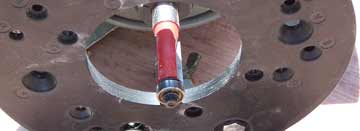
Detail of Router bit. It's a flush cut bit with a little bearing. It was quite pricy but has been very useful in all my boatbuilding.

Nice clean slot gets sanded so there is no burr, then the raw wood gets a first coat of epoxy. You can see the screws to the left and right of the slot. These help hold the daggerboard case.
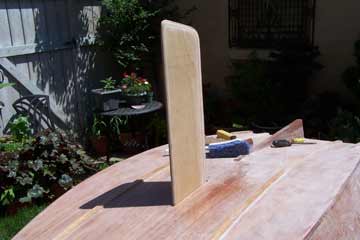
The daggerboard fits with enough slack to ensure good fit once it has a couple of coats of epoxy and paint. I have no idea of how big the daggerboard should be. I just made it a convenient size. It is certainly not a naca foil!
Even though the bottom is only quarter inch plywood, or rather its metric equivalent 6mm, it is very rigid. The 2 layers of fiberglass plus the runners, sked, and seats all contribute to this. Photo shows the daggerboard in backwards!

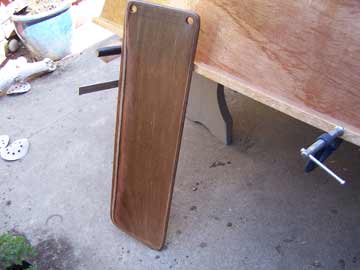
After some adjustment and sanding the gunwales have been glued to the stern. It will need some fitting and filling. Because of the angles the gunwales do not flow nicely all around. I'll wait to decide how to finish it until I have seen it upright. The reinforcement will hold the rudder. I suppose a motor could be put on if it was very small. The sides had a few spots where the fiberglass cloth was not completely imbedded so I put another coat on sides, bow and stern. The bottom which is on top, is fine. The daggerboard hole gets a second coat also.

Bow gunwale glued in. The gunwales are one of the few fudges that I will be doing on this boat. Because of the various angles meeting, I expect I will be doing a wee bit of filling and sort of grinding everything even. It will not be outrageous but not really very elegant work. The alternative is to carefully cut and fit each piece and it becomes quite time consuming.
I'm feeling guilty but I'll live with it.

Surprise quality control inspection. I think Winston sees something he is not fully satisfied with.
Since the daggerboard fits perfectly it gets a coat of epoxy. The bow and stern gunwales also get a coat. The skeg gets a last epoxy lick from the bottom of the batch.
END OF DAY 7. The outer hull is basically done (except for sanding of course). I have began sanding and it's quite smooth. A couple of hours will give me a good enough surface to paint. The daggerboard only needs finishing.On to the inside.
email: Christine
This web site reflects my personal ideas and doesn't represent anyone else's point of view. I'm not an expert boat builder and don't suggest that how I'm doing this is the best way, use your head.
I'M BUILDING A SCAMP SAILBOAT
PAGE WITH BOATBUILDING BOOKS
BOAT PLANS FREE STITCH AND GLUE BOAT PLANS
Bateau has Boatbuilding plans suitable for beginners, including some free plans, as well as boatbuilding supplies such as epoxy and fiberglass
BOATBUILDING TOOLS, YOU ONLY NEED A FEW TOOLS TO BUILD A BOAT
Boatbuilding books
Boatbuilding for beginners:
Ultra simple boatbuilding

Buehler's Backyard Boatbuilding

The Master Craftsman's Collected Teachings on Boat Design, Building, Repair

Featherweight Boatbuilding, has plans and instruction to build a Wee lassie canoe

HOW TO DECIDE WHAT KIND OF BOAT TO BUILD
MY BOATS
MAKING A CARBON FIBER MAST
TEN KNOTS YOU SHOULD KNOW IF YOU HAVE A BOAT
ROPE INFORMATION, POLYESTER
BUILDING MY SKERRY
STITCH AND GLUE BOATBUILDING
TANZER 22 MAIN PAGE
MARINE PLYWOOD STANDARDS
BOAT PLANS FREE STITCH AND GLUE BOAT PLANS
FIND OUT ABOUT DIFFERENT TYPES OF ANCHORS
BUILDING A PUDDLE DUCK RACER