DAY 12
Apple Pie Dinghy

DAY 12 of building the Apple Pie Stitch and Glue tender for my Tanzer 22.
Added 2 more coats of paint. Second coat dried too fast because it was too warm. Left surface a bit bumpy. Too bad.

My little pram's daggerboard gets a coat of paint.

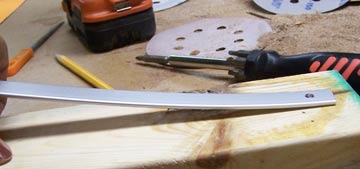
I had bought aluminium strips but there were no holes. I made a pilot hole then countersank the screw head. Set-up took a bit of time but was quick after that.

Used the drill press to countersink and drill. Faster and easier but I could have drilled with the hand drill.

I was worried that the small screws would not hold but the test shows that they are surprisingly strong. The rubrails are not very thick and I don't want to drill into the bottom of the boat in case water gets in the plywood. The strips can easily be replaced if they get damaged but the bottom is more complicated.

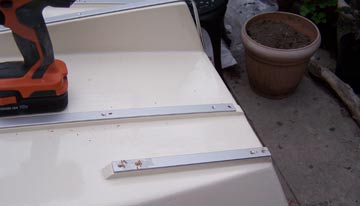
Aluminium strips ready to be installed. I'm using fat short screws with big thread. I always use Robertson square screws because they are the easiest type and stay on the driving bit or screwdriver. They are the most commonly available here. (Canada eh!)
I had left my caulking gun on the Tanzer! I had to improvise. Worked fine. I prefer to use a different material to seat things on a boat. Silicone doesn't play very well in a shop if you have to do any painting. Hopefully I will have cleaned well.

Predrilled all the holes and filled them with silicone as best I could. Laid a bead of silicone on the wood and on the aluminium and screwed the strips down. I did it by hand because I did not want to take the chance of overtightening the screws and stripping the hole. I had a bit of squeeze out, perfect! I decided to use larger screws on the skeg. I had thicker wood there. I had to decide if I would countersink deeper or have the screw sit a bit proud. In the end this is what I did. The material is not very thick. I can countersink deeper later if I don't like it.
NOTE: I took a look at it in the morning and deepened the coutersink holes and re set the screws. I should never make a decision when I'm tired.

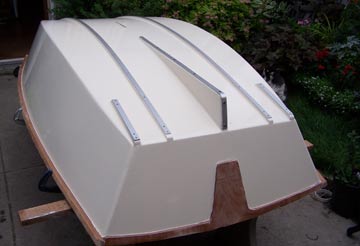
Aluminium strips have been installed on the Apple pie dinghy. I had rounded the bottom of the strips and I think it makes the aluminium look a bit odd at the end.

View from the front. Bottom is essentially done now. Tomorrow I will turn the hull over and work on the inside. At this point the boat would float with no damage.
I have now spent a total of 88 hours building this pram dinghy and its sailing rig.
This web site reflects my personal ideas and doesn't represent anyone else's point of view. I'm not an expert boat builder and don't suggest that how I'm doing this is the best way, use your head.
email: Christine
I'M BUILDING A SCAMP SAILBOAT
PAGE WITH BOATBUILDING BOOKS
BOAT PLANS FREE STITCH AND GLUE BOAT PLANS
Bateau has Boatbuilding plans suitable for beginners, including some free plans, as well as boatbuilding supplies such as epoxy and fiberglass
BOATBUILDING TOOLS, YOU ONLY NEED A FEW TOOLS TO BUILD A BOAT
Boatbuilding books
Boatbuilding for beginners:
Ultra simple boatbuilding

Buehler's Backyard Boatbuilding

The Master Craftsman's Collected Teachings on Boat Design, Building, Repair

Featherweight Boatbuilding, has plans and instruction to build a Wee lassie canoe

HOW TO DECIDE WHAT KIND OF BOAT TO BUILD
TEN KNOTS YOU SHOULD KNOW IF YOU HAVE A BOAT
ROPE INFORMATION, POLYESTER
BUILDING MY SKERRY
STITCH AND GLUE BOATBUILDING
MARINE PLYWOOD STANDARDS
FIND OUT ABOUT DIFFERENT TYPES OF ANCHORS