

Steps in Building a SCAMP sailboat
Links to all my scamp building pages.
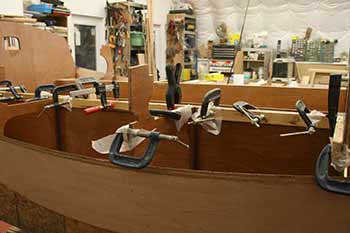
Seat Supports get glued
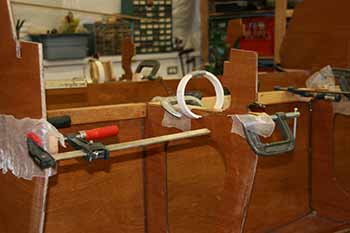
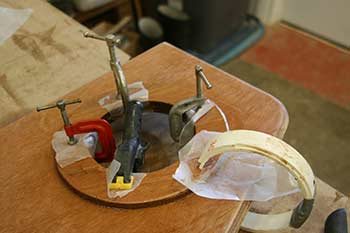
I coated the seat supports for the port side, with resin and glued them onto the bulkheads and the seat verticals. I'd sanded the glue area because I already had one coat of epoxy and wanted some roughness.
Wax paper keeps the clamps from sticking.
These supports help glue the seat cover which is alto the top of the side watertight compartments.
OH NO! Moment
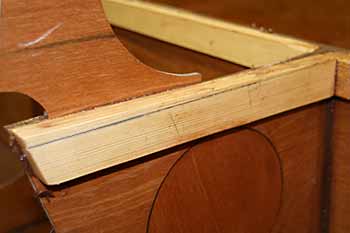
I realized that I had glued them on crooked. I forgot to allow for the thickness of the seat and aligned the side strips too high. Doh!
The end that faces towards the centre of the boat is at the right height. I have to cut a wedge off.
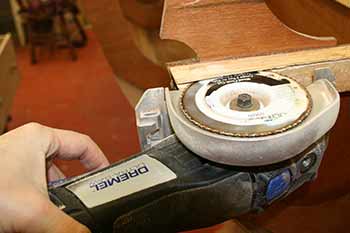
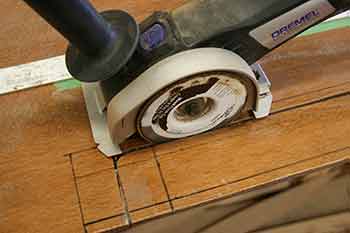
I tried cutting with the Japanese saw but I figured my Dremel saw might work really well here and dug it up. I had not used it since cutting out some of the straighter parts of the boat. It worked really well and got to withing about an inch from the end. I chiseled out the piece which was still glued to the side. The glue seam held on for dear life. No fear of this joint coming apart because of glue failure. Epoxy is amazing.
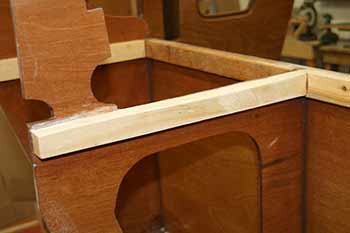
Moving on... I coated the support planks for the starboard side. You can bet I'll be pretty careful lining them up.
Started gluing the starboard supports in. Check and check again, seems OK. I will have to shorten some of the cross pieces. I cut them too long because I forgot to include the thickness of the glue lines, no harm done.

After a quick trim I was able to install the rest of the supports. They are all in place now.
I'll have to do a quick sand because it got pretty gummy. Usually I work quite cleanly but this time everything got sticky and gooey.
Fitting Side Benches and Installing Hatches

I turned my attention to the side benches. They needed to be fitted and hatch openings and doublers cut.
After widening the slots that bulkheads go through and slightly shortening the benches I was able to slide them in and tweak the edges that touch the sides of the boat. Not a huge amount of fitting was needed but I did cut some bevels on the back end where the second strake is actually at quite an angle and was pushing the bench out of alignment.
The front and back corners also had to be rounded to allow for the fillets.
There is about a mm overhanging the sides and that will sand off very nicely after I glue the benches down.
Hatches
I've decided to put 2 small round hatches at the very back. Since I had closed off the very last compartment to make separate air tight compartment I wanted to be able to access the inside. The port side also will have a motor mount so I need access so I can tighten the installation nuts and bolts.
I am also installing 2 small rectangular hatches in the centre of the benches so I can access the lockers.
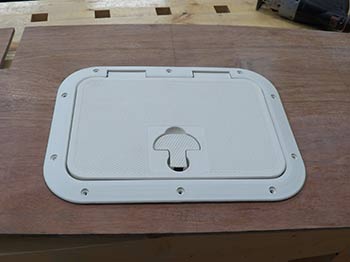
I had considered making the hatches but when I looked at the plywood I had left, I found that I did not have enough to do all the required hatches. If I count the amount of time and the cost of the delivery It seems that making the hatches is of no advantage at all. So I will only make the front compartment hatches and use commercial ones for the rest.
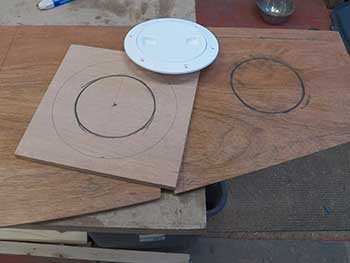
I cut the round hatch openings using a circle cutter I bought a million years ago, on sale. I'm amazed on how much use it's actually gotten.
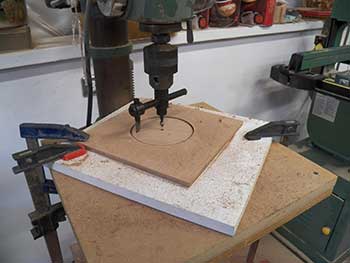
This is exactly the model I have and I can recommend it. General Tools 55 Heavy Duty Circle Cutter. Adjustable 1-3/4 Inch to 7-7/8 Inch
The hole cutter must be used on a drill press. I set up the bench tops on the drill press and cut the holes, I then cut the holes for the 3 doublers. 2 for the benches and one for the fill hole in the water ballast tank. I'll cut the floor hole when I start work on that area.
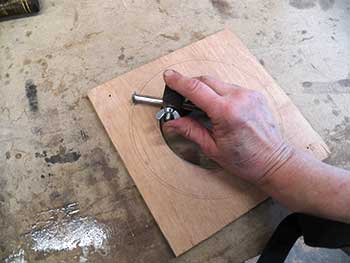
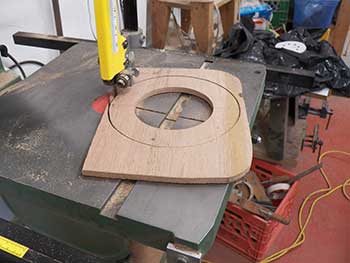
I used the scratch gauge I had made in the winter to draw the outer circle. It was quick to cut that out on the band saw.

After a bit of sanding and rounding of the outer edge the doublers were ready for installation.
They will be glued under the hatch openings to re-enforce the bench and the floor openings.
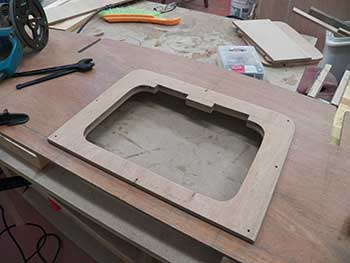
Rectangular hatches
I also have 2 rectangular hatches which will give access to the side lockers.
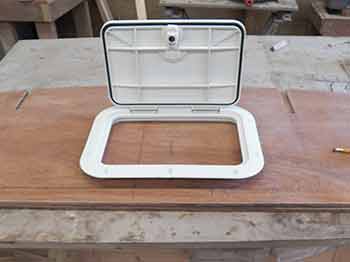
I positioned the hatch so that it would open and not be blocked by the side coaming and also in a spot where I could reach the 2 adjoining sections of the locker. I would have to reach as far as I can but I can reach if I have to. The alternative would be to add more hatches.
Once I had the position I marked it on the seat top.
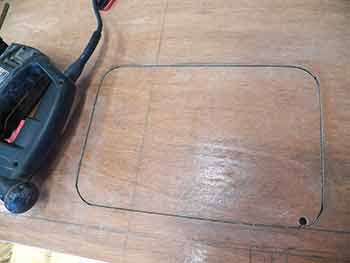
I used my jig saw to cut the opening. Drilled a pilot hole first. The cut was quite smooth and I only had to touch it up a bit with a file then sandpaper.
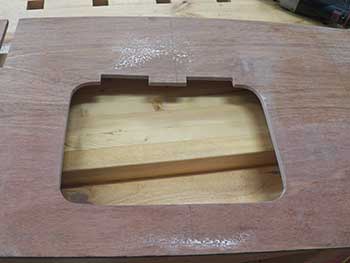
The opening is good and accurate. I can use it as a pattern now to cut the rest of the openings. 2 for the doublers and one more on the second seat.
The little rectangular notches are for the hinges.
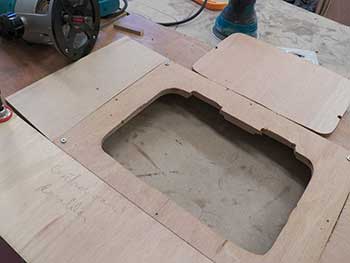
I set up the flush trim bit in the router and marked and rough cut the opening in the doubler. It saves time to remove most of the material with the saw rather than have the router cut it.
I used a few screws to position the doubler and cut the opening following the good opening I had made in the bench top. The extra wood pieces are to provide a steadier area for the router base.
The pattern is under the rough cut opening so it does not really show. The bearing on the router bit is at the bottom of the bit so the pattern needs to be at the bottom. It worked well and the only part I had to touch up were the sharp inner corners of the hinge recess.

I rounded the 2 back corners using the band saw, and sanded and smoothed the edges. The front edge will be glued against the edge of the seat support at the front so are better not rounded. I measured very carefully to make sure the doubler would fit against the edge with just enough space for a nice thick glue line.
I now have my 2 hatch openings done and the doublers ready to glue. The actual hatches will not go on until the boat is painted and the other hardware gets installed.
The exact positioning of the Starboard side hatch is trickier because of the centreboard case which has a small inspection hatch. I will position this first.
I have sanded the inside of the lockers and am ready to put a final coat of epoxy and paint the inside before I glue on the seat.

I measured and measured again. I used the Dremel saw to plunge in then cut the centreboard inspection hatch. The corners were easy to cut with a little hand saw. I ended up taking just a touch under an eight of an inch off. I think that will mostly be re gained with the epoxy and the paint layers.

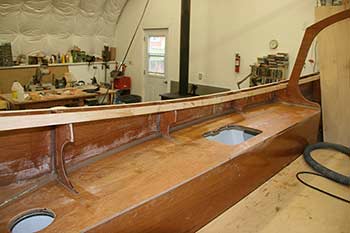
The inspection hatch is cut and fits well. I could then go on and finalize the large hatch and smaller round hatch at the back of the starboard seat.

After cutting the hatch openings I glued on the doublers and cleaned up the area. After a quick sand the back of the seats are ready for paint.
I don't need to paint because everything is well coated with epoxy and waterproof but white paint makes the locker brighter.


The seat covers have been painted. I taped off the gluing areas. I will rough up the epoxy before gluing the seats in place.


The port lockers are painted. The starboard lockers will be next. I needed to install the centreboard pivot cap. It covers the spot where the pivot comes through the centreboard case. In theory it can be taken apart if I need to access it but in practice it's quite well gooped and screwed in and would be a real chore to take apart. I'm using 3M 4200 as a sealant and adhesive. I've used it on the Tanzer and really liked it.
While sanding the inside of the starboard lockers I noticed that the joint between 2 pieces of the sheer plank was not as well taped as I would like and I added another layer of glass and a couple coats of epoxy. Once that's set I will be able to finish sanding and paint it also.


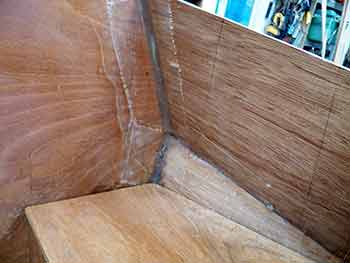
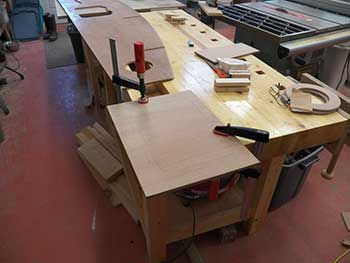
After roughing up the glue lines and dusting everything very well I mixed up a lot of glue and squeezed it on the bench supports.
All I had to do was to drop the seat without smearing the glue and that went well. After that the stress went down.
I added a few screws along the inside edge, and put weights on the rest of the joints.
There was a satisfying amount of squeeze out from the edge. This means that there is enough glue on this critical surface. All the other seams will get fillets so I know they will be watertight. The seam on the seat upright is the only one that needs to be perfect. Unless I do something stupid with the fillets, or the hatches leak, I will have 2 watertight compartments, a tiny one at the very back, and a larger one.
After the epoxy sets, I will go and make careful, beautiful fillets.
It's funny crawling up in the boat. I use a stepladder. It's quite a cosy cockpit. It feels safe and comfortable even in its unfinished state.

Both port and starboard seats have been glued in position, trimmed flush using a router and filleted in place. This is an important fillet because it actually supports the seat at the back. It glues it to the top plank.
It always surprises me how long it takes to make tidy fillets. I guess if I made a lot of them I might be faster but as it is I am slow. At this point I went on to work on the under cockpit compartments and ballast tank. I will be fitting and gluing the floor, and making the openings hatches to the various compartments.
emails: Christine
If you decide to build a boat be careful. These tools can be dangerous. If you don't know how to safely handle something find out. There are lots of forums out there with people willing to help you.
This web site reflects my personal ideas and doesn't represent anyone else's point of view. I don't claim to be an expert in anything, just some little old lady muddling along.