
How to Make a Witch or Wizard Hat, Part 1
Part 2 is HERE

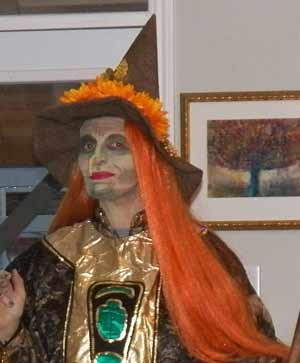
No Witch or Wizard costume is complete without a hat! Everyone associates witches with black pointy hats with wide brims. Wizards usually have more earthy looking hats with narrower brims. But the Witch / Wizard fashion is not written in stone! Here are directions on how to fit and make a Wizard's or Witch's hat.
Step 1. Making a pattern for the wizard's hat.
Materials and tools:
- 2 pieces of stiff paper or cardboard
- A tape measure or a strip of cloth or string
- A ruler
- A marker or dark pencil
- Scissors
- Suitable fabric
- Interfacing to stiffen the hat
- Pins, needle and thread
- Sewing Machine is helpful but this could be made by hand if you are patient
- Clothe Iron
Making a pattern will help you fit the hat to the intended head. The actual construction will go faster if you don't have to worry about fitting the hat as you build it
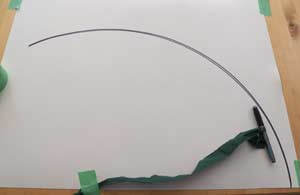
Tape the card to a flat surface so it won't move and measure the height you would like your hat to be plus one inch on the edge of the cardboard.
The hat I am building will have a finished height of about 15in. so my arc is 16in. in radius.
Take your string or strip of cloth and tie it to the marker or pencil, tape your other end on the mark you made, and make an arc of 16in. radius on your card.


Make a line from a point on your arc to your centre point 16 inches away.
Using a tape measure or your strip of cloth measure your head across the forehead where you want the hat to sit.
Lay your strip of cloth, starting on the line you just made, along the arc and mark the circumference of your head on the arc. Do this carefully without stretching the cloth.
Now adjust for the thickness of the material. If you are using thick fabric, or plan to line your hat add about an inch to the head measurement, and mark it. If your fabric is very thin only add half an inch, if it's very thick adjust accordingly. When in doubt too large is better.

To the marks showing the circumference of my head, I have added an inch to allow for the thickness of the material plus one half inch at both ends for seam allowances.
Using your ruler connect the expanded marks to the centre point. This will be your pattern. Later you will add 3/4in. to the rounded side which will be the base, as a seam allowance.

The pattern is now cut out and needs to be assembled to check for size using staples and tape.
The easiest way to make the cone is to bring the 2 seam allowances together (the half inches that were added.) and staple them one half inch from the edge all along from the bottom to the top.
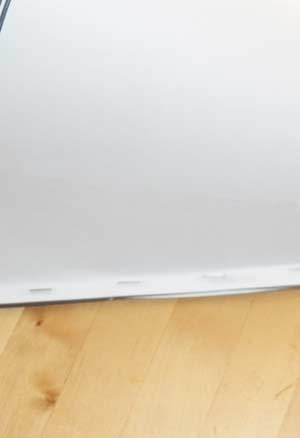
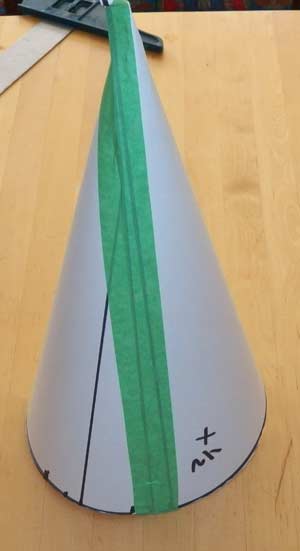
Detail of the staples on left. The seam gets flattened and taped on right.
The top is now stapled and taped and it's a cone shaped that will be the pattern for the top of the hat. At this point the top point will not be very tidy, that's not a problem.
The cone should fit on your head, check it and adjust your pattern if it is too large or small. Remember it should be slightly too large because you have added an inch to allow for the thickness of the cloth.

Place your cone on top of the second piece of cardboard and trace around the base. If it's not round then correct the shape. It should be as close to a circle as you can get it.
You need to decide how wide you want the brim of the witch or wizard hat to be.
Draw another circle outside the one you just made. This will be the brim of your witches hat. It can be very narrow or wide, it's your choice. If it's very wide you might need to add some wire in the rim to help support it.
Draw a third circle outside this one for the seam allowance, 1/2 inch will be enough.
Add a seam allowance towards the inside of the hat. this should be at least 3/4 of an inch wide.
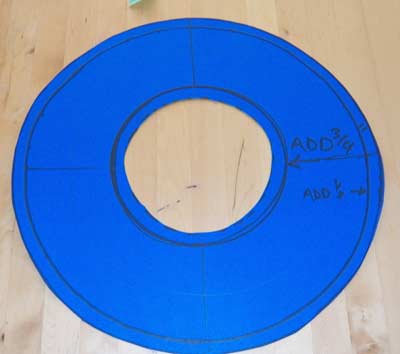
Cut out the pattern.
Carefully remove the tape and staples from the cone piece and lay flat. NOTE: you will need to add 3/4 inch seam allowance at the bottom when you cut your fabric.
You are now ready to cut your fabric. If your fabric is very floppy or your brim is wide as in this case, you will need some stiffening material. I used heavy weight Pellon. I had a piece with some printing but usually it is white or black. When choosing your fabric avoid knits if you can.
Making the Witch or Wizard Hat
Putting the hat together is fairly simple if you are careful.

Place your pattern on the fabric and either pin it on or trace around the edges. You will need 2 brim pieces of your fabric and one of the stiffener.
Because the rim is round it makes no difference how you align the fabric. The top part of the hat is easier to work with if you align and cut the edges so that they are both diagonal to the grain of the fabric so it will not fray as much.
You will need one piece of the top (don't forget to add your 3/4 inch seam allowance at the bottom curved edge).

You will also need one layer of stiffener.
Iron on stiffener would also work fine.
Here my 2 brim pieces have been cut and one only of the top, plus one rim and one top of the fancy printed pellon. I had picked this up at a printer's show many years ago. They were giving out samples to show they could print on other things besides paper. Pellon is a common material, it's a bonded synthetic non woven material and it has no right and wrong side and no nap.

Pin the brim pieces together. The fabric goes good side to good side with a layer of stiffener on top. So the order is: fabric good side up, fabric good side down, Pellon any way you want. Put lots of pins to hold everything together. If you prefer you can baste instead of pinning.
I waited till I had sewed the rim together to cut out the interior. I cut all three layers at once. Saved me from any trouble if my hole was not perfectly centered or round.
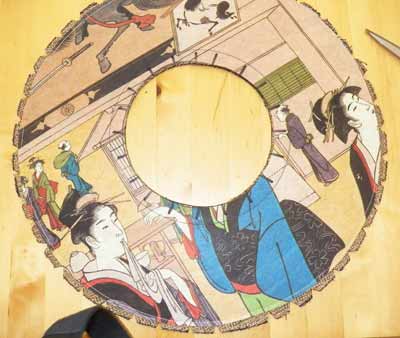
Sew all around the brim, 1/2 inch from the edge. Then trim the stiffener as close to the seam as you can comfortably get. Snip out little wedges out of the seam allowance, don't clip too close to the seam. This will remove little wedges from the edge and allow the brim seam to lie flat when you turn it right side out.
Carefully make a series of snips without taking any material off along the inside hole. Do not cut right to the edge when you are snipping. Stop about 1/8 inch shy of the seam position.
Part 2 is HERE
email me if you find mistakes, I'll fix them and we'll all benefit: Christine
 Making a Wizard's Coat
 Making a chef's hat

Zombie Walk Costumes
Skeleton Costume
Medieval Costume
A King Costume
Zombie Garden Gnome
4 Halloween Costumes
A few Masks

Liquid latex is used to make fake dead looking skin, scabs, warts, wounds and other prosthetics. It can be used to stick and blend in fake noses and chins.
Liquid Latex (16 Fluid Ounces)

Witch nose attach with latex:
Woochie by Cinema Secrets Witch Nose Latex Appliance- Large, Multi, One Size

Need help with your sewing?


Beginner's sewing kit has scissors, needle and thread, measuring tape and more.
SINGER Polka Dot Small Sewing Basket with Sewing Kit Accessories

Iron on pellon is easy to use, just iron on the back of your fabric to stiffen it.
Pellon Peltex One-sided fusible stabilizer

DENIYA Synthetic I Tip Keratin Fusion Hair Extensions Various Color 5G/Strand 50 Strands/Pack Keratin Tip Stick Hair Extensions (I-Tip 45cm)

Small Print
This information is for general knowledge. Think about what you are doing, be careful.