

Steps in Building a SCAMP sailboat
Links to all my scamp building pages.
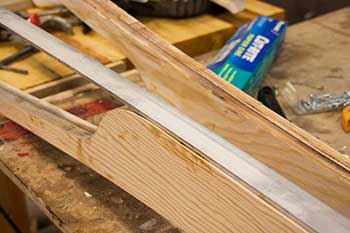
Bending and fitting the aluminium strips that line the bottom of the skegs.
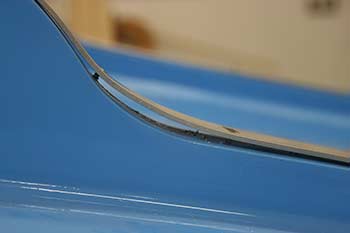
I guess they could be called worm shoes. They are 3mm thick and 8 feet long aluminium strips. I bought enough to line the whole length of the skeg (Making and fitting the skeg here) but I need to bend it before installing the skegs. This way I can use the skeg to shape them. I can access the whole piece and use clamps on it. Of course it turned out to be harder than I expected. The 3mm was thick enough to be difficult to bend by hand. I chose the thicker metal to give enough thickness so that the screw heads could be countersunk and not protrude when they are installed.
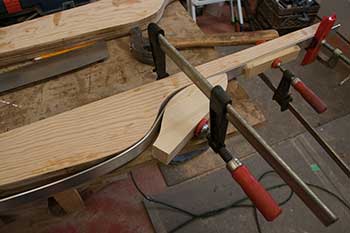
I used clamps to force the strip to bend into the curves. Unfortunately they bent some but would spring back too much. I used various wood pieces to shape the aluminium.
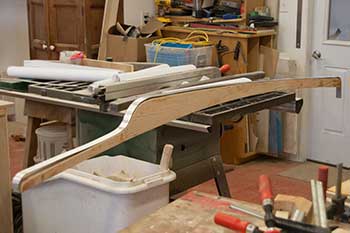
It took quite a lot of time to bend the various curves. I kept going to the band saw and making different wooden forms to clamp against. I was able to adjust a little by hand but the metal is quite stiff.
Eventually I deemed it "good enough". Since I plan to screw the metal down as well as glue it using bedding compound I think the shoe will fit adequately. I will use 3M 4200 which is supposedly somewhat removable. My experience is that it's near impossible to remove once set.
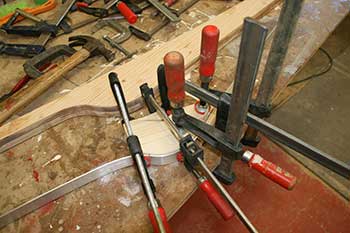
The first piece I clamped all the bends at once on the skeg. I then went backs and fine tuned the various bends. This took a long time.
When I fitted the second piece, I started at one end and bent the metal to the finished curve before going on to the next bend. This worked better and took less time.
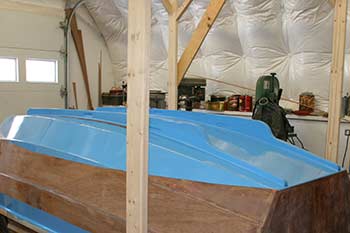
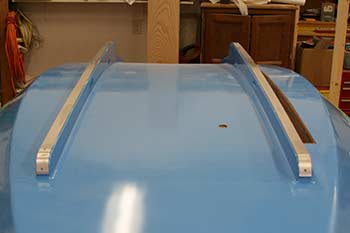
A few months have passed and I have just finished painting the bottom of the boat, so I can install the metal shoes before turning the boat over and finishing the top.
The shop is quite cold so I work on the skeg lining pieces while paint dries enough to be sanded.
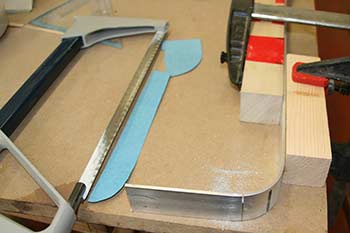
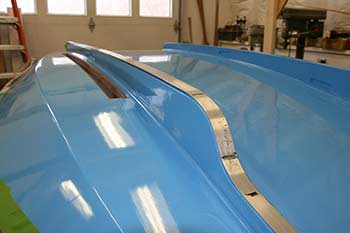
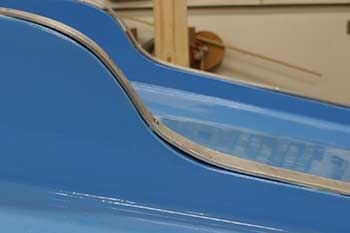
I made patterns of both front and back of skeg and used that to mark where the metal should be cut. I taped the end so it would not scratch the bottom and checked the fit front and back. No surprises, I'm happy.
The next step will be to sand the end smooth and attach the skeg shoes.
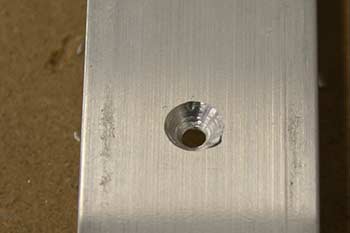
I have a countersink bit and I used this to cut a v shaped hole in the bottom to embed the screw in the metal. Sadly the countersink bit has only 2 teeth and sort of wobbles and makes an uneven hole. I have an old blunt one that has 6 teeth so I'll see if I can sharpen it enough to do a better job.
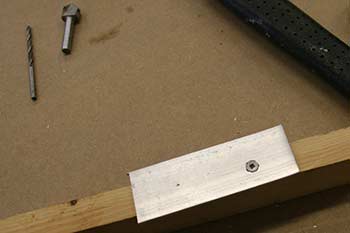
I tried attaching a scrap of the metal to a piece of wood and other than the somewhat rough countersinking job, it will work fine. It's much stronger than it looks. I'm using slightly shorter screws than I would have liked. 3/4 inch is maybe not enough but the metal is not that thick and the screw head is just the right size. I'll put on more screws than planned. These along with the 3M 4200 that I'm going to use to bed and glue the shoe will do the job. 4200 is said to be removable but that is wishful thinking in my opinion.
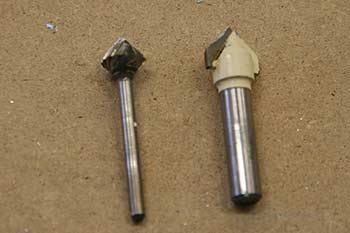
I checked out the hardware store but they did not have any proper metal countersinking bit so I went back to my bits and found a somewhat elderly cheap but sharpish router bit and a little dremmel bit. If I cut a rough hole with the router bit then finish it with the dremel bit I get quite a nice hole. Problem solved.
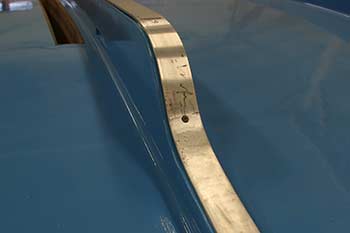
I put metal strip on and started drilling small holes for the screws. To my horror I found that the curve at the back of the skeg had a large gap. That section was too short. It had been hard to measure. Not a lot of choices: straighten out the end curve and re bend, leave it and learn to love the gap, stretch the metal somehow. It had been hard to bend the end and now that it was trimmed to size it would be even harder. I decided to try and stretch the metal a bit.
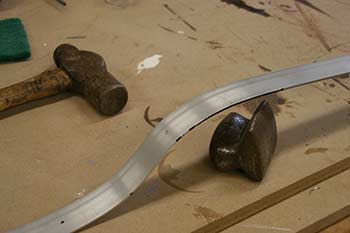
I had a auto body shop dolly I had picked up in an estate sale and I dug up my largest ball pein hammer and hammered the area that I wanted to stretch. I banged from the back so the marks would not be so visible on the good side.
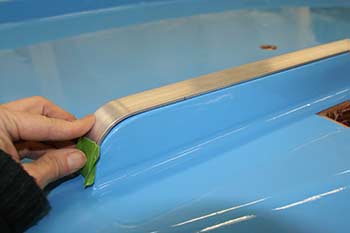
The metal did stretch but was quite banged up even on the front. It took a while to sand the strip and straighten the edge but the repair is not really visible and the strip fits much better. I did not want to overdo the stretching in case the metal became brittle.
I removed the screws and gooped the holes and the underside of the strip with 3M 4200. I've never won a battle with that stuff yet. It is sticky, gets on everything, is hard to squeeze out of the tube, and is impossible to clean up if it sets. Still it glues really well, never gives up and cushions nicely. I applied it and replaced the screws. After cleaning up the squeezed out goop I looked at the strips and deemed them to be good enough. Like cookie monster said "Not bad but not terrific".
emails: Christine
If you decide to build a boat be careful. These tools can be dangerous. If you don't know how to safely handle something find out. There are lots of forums out there.
This web site reflects my personal ideas and doesn't represent anyone else's point of view. I don't claim to be an expert in anything, just someone muddling along.
I pay for maintaining this website by having links to Amazon.com. I choose the ads to be relevant to the content. Mostly stuff that I buy myself or lust after. If you buy after clicking one of the links I get a small fee.
I live in a mostly rural area and suppliers of boatbuilding stuff are pretty thin on the ground. Amazon has proved to be a reliable and well priced resource.
SCAMP envy/Lust This is a thread in the Wooden Boat Forum.
DEWALT DW3742C 14-Piece T-Shank Jig Saw Blade Set with Case

Gyokucho 770-3600 Razor Ryoba Saw with Blade

Bessey LM2.004 LM General Purpose Clamp

Garboard Drain and Plug from Sea Dog

I often buy books just for the fun of reading and dreaming about my next boat build. Building the Greenland Kayak : A Manual for Its Contruction and Use


LifeStraw Personal Water Filter for Hiking, Camping, Travel, and Emergency Preparedness

Stanley Classic Vacuum Bottle 1.1QT Hammertone Green
Devlin's Boatbuilding: How to Build Any Boat the Stitch-and-Glue Way

Building Classic Small Craft : Complete Plans and Instructions for 47 Boats

WaterProof Headlamp

SeaSense Galvanized Claw Anchor, 22-Pound

Varnish,Spar,Oil Satin,Qt

Carbide Scrapers are really useful in smoothing out epoxy. Saves hours of sanding. Warner 803 Carbide 100X 2-Inch Scraper with Double Edge Blade

How to get on the water cheaply and quickly, buy an inflatable kayak. Deflate for storage. No maintenance either.

Intex Explorer K2 Kayak, 2-Person Inflatable Kayak Set with Aluminum Oars and High Output Air Pump
Fly Fishing Line Scissors Lining Cutting Shears Stainless Scissors Tool 4" ..... Best Seller on Amazon!
Pyle Megaphone Speaker PA Bullhorn with Built-in Siren - 30 Watt Voice Recorder & 800 Yard Range - Ideal for Football, Soccer, Baseball, Hockey, Basketball, Cheerleading Fans & Coaches - PMP35R
Spyderco Delica 4 Lightweight Black FRN PlainEdge Folding Knife
If you decide to build a boat be careful. Some of the tools and materials can hurt you. I offer this page for entertainment and don't want to imply that my method or ideas are necessarily the best way to do things. It just worked for me.
In Canada Warner 803 Scraper
Extra scraper blades