
Making a Scratch Gauge
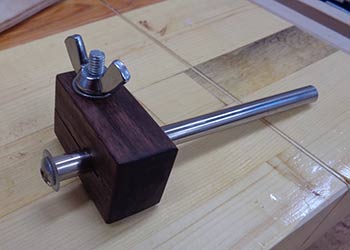
In the last month there were 2 occasions when I wished I had a scratch gauge to mark an even distances from an edge without having to measure every time. Once when I was building my workbench and laying out the mortices and tenons, and again when I was measuring on the SCAMP parts for the bevel on various pieces. I marked the transom and bow by hand and it takes time to get it accurately. The terms scratch gauge and marking gauge seem to be both used.
There are many versions available commercially, for example the Faithfull Combination Gauge - Screw Adjustment.
There are also countless instructions on Youtube and Instructables if you are interested in making one. This is how I made mine. In total it took about 2 hours to make.
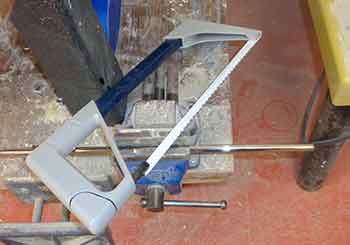
The Marking Gauge Rod and Cutter/Scratcher
The rod I used was from an old colour jet printer. The ink cartridge rode on the rod. I took it apart one day to see how it worked and had kept the rod just in case. I don't think the rod is critical as long as it's smooth. I suppose a dowell could be used too. I cut mine about 6 inches long and smoothed out the burr. I used a file to square the end because I had not cut perfectly square.
This rod is about 3/8 of an inch. If you have a choice pick one that is the size of a drill bit you already have.
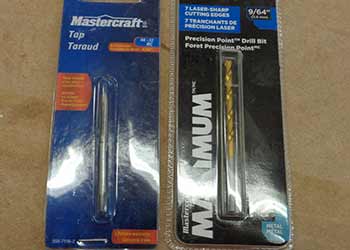
Drill bit and Tap are used to drill and make threads
In order to attach the little cutter at the end I drilled a hole in the end of my rod and cut some threads to allow a screw to go in. It sounds more difficult that it was and I did not have any trouble at all. If you decide to do this you will need a tap which is a screw cutter for the inside of a hole and a drill bit that is matched to the tap. They are often sold as a set and are not expensive. You can also buy a little holder for the tap but it is not necessary. The screw will have to fit inside the hole and because there are different kinds of thread you have to get the right number of threads per inch and the right diameter.
Drilling a hole and cutting threads in the end of the rod.
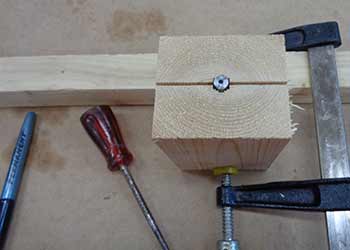
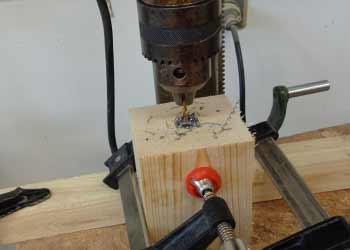
I cut a groove in a 2X4 and cut it in 2 so that I could put the grooves together and have a spot for the rod. I used that to hold my rod upright. I clamped everything on the drill press and made sure it was square.
I marked the spot where I was to drill and punched a dent to start the drill bit in the right spot.
I put a drop of oil on the end to help drill and I had no trouble at all. I went slowly and took the shavings out several times. It's interesting that a small piece of metal flew into my face but I was wearing goggles so no harm done.
Cutting the threads
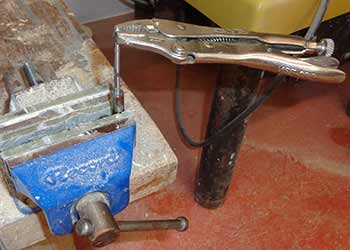
I used vice grips to hold the tap and slowly cut the threads. The instruction were to screw in the tap a short bit then backwards to clear the threads. It worked very well and soon I had my threads cut. I shook out some metal shavings and went looking for a screw.
I have a lot of little machine screws and various other hardware so I went to my supplies and found a screw that fit the threads that I had cut. If I did not have all my screws I would have bought one when I got the bit and tap. The screw is about one half inch long.
Sharpening the cutter
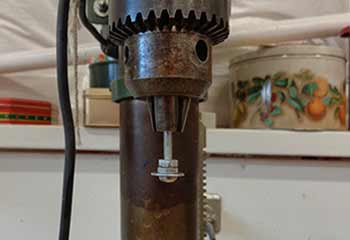
The cutting/scratching wheel is made from a sharpened washer. To sharpen it I screwed the washer onto a small bolt and put it on the drill press. While the washer was turning I used a file to sharpen it. I tried using a drill and rubbing the washer against the file but I had trouble controlling it and bounced around some.
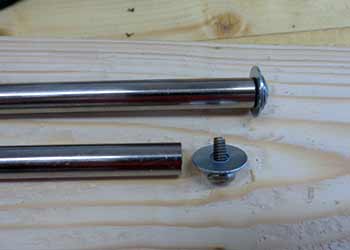
After sharpening the washer I used the screw to attach it to the end of the rod.
I had actually cut and prepared 2 pieces. I figured there was a good chance that I would make a mistake or that something would go wrong but nothing bad happened. One is slightly off centre but not by much.
Making the wooden housing for the marking gauge.
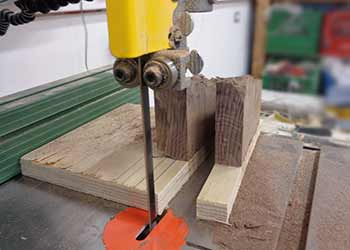
I had noticed some nicely coloured wood in the firewood pile so I dug up a piece and cut a slice. I hot glued the wood to a square piece of plywood and used the edge to guide me through the band saw. It was hard wood and did not cut very fast.
I think the wood is walnut. There are a lot in the area.
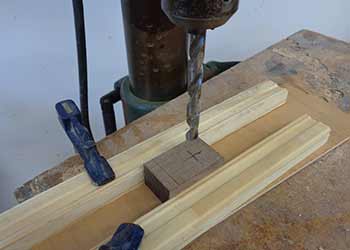
My drill bit is exactly the same size as the rod. I made a hole in the block of wood about 3/4 inches away from the end. I then turned the block sideway and drilled a smaller hole on the side. This is the hole that will hold a screw and butterfly nut that will squeeze the wood and tighten the rod in place.
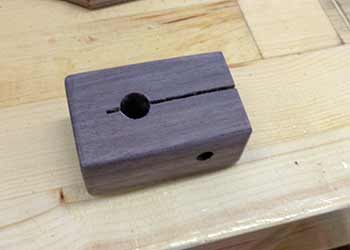
The second hole is about 1/2 inch from the opposite side and centered.
After cutting the second hole, I cut a slot through the rod hole from the long side and about 1/4 inch into the other side. This side was 3/4 inches. This leaves 1/2 of solid wood on the left. If I had used a softer wood I think I would have either left more solid wood or put in a spline or 2 with grain running the opposite way to reinforce the end.
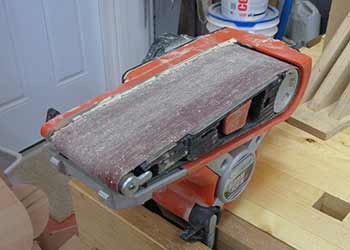
I used the belt sander to smooth out the grooves from the bandsaw and to round the edges. I ended with the random orbital sander to smooth it out. Making the wooden part only took about 45 minutes of easy slow pace.
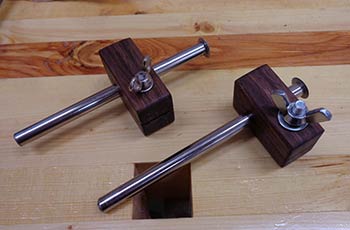
After checking that everything fits and worked, I put a coat of linseed oil on the marking gauge. I also epoxied the screw in place so that it would not turn when I tightened the butterfly nut. There is a washer between the butterfly nut and the wood. I countersunk the head of the screw. After letting everything set for a while I assembled the scratch gauges. I ended up with 2. One is slightly tight so after things have dried better I will sand the inside of the rod hole just slightly. Otherwise they both work very well.
I try to be accurate and check my information, but mistakes happen.
email me if you find mistakes, I'll fix them and we'll all benefit: ChristineThis is the belt sander I use from Black and Decker and I have no trouble recommending it. It's handy because the nose has a smaller diameter and it can get into narrower spots.
Vermont American
Craftsmanspace has lots of diagrams of variation on the scarf joint.
Franklin Adhesives and Polymers has an article on their finger joints.
One Ocean Kayaks uses a interlocking finger joint
Chesapeake Light Craft use puzzle joints in their boat and kayak kits. Most kit makers now have a variation on this.
Teach Yourself to Sail
Ten Essential Knots
Marine Plywood Article.
Making a handmade carbon fiber mast for your sailing dinghy
DIY Launching Dolly for small boats
Making a birdsmouth mast
My sailmaking experiments
Carbon Fiber Characteristics
Making a Puddle Duck Racer
Launching a stitch and glue Apple Pie Pram that I built as a tender for my Tanzer. The plans were free
Nautical Terms explained Boat building has its own language. Here are the most common boat hull terms explained.
Small Print
This information is for general knowledge. It's not intended to replace plans or proper instructions. If you are not comfortable using powertools get help cutting and drilling. Be safe and have fun.