
Making Biochar, Take 2 and 3
Having successfully made a batch of charcoal from waste wood around the compound, I wanted to see if it was possible to make charcoal and still use the heat.
In my wood gas stove experiments and research, I had run across trials where the goal was to restrict the amount of air getting to the fire so that it burns slowly and at the end does not consume all the fuel. Instead, there is a usable amount of charcoal left over from the process which can be used later as fuel or can be returned to the soil.
My goal with the wood gas stove was to use all the fuel as cleanly and well as possible. This was different. The goal was to produce usable heat for cooking (or whatever) while leaving behind some biochar.
Paal Wendelbo makes an interesting stove
Link to good project for stove and charcoal. Working in an Uganda refugee camp.
This stove like several other also produces biochar.
My Experiment
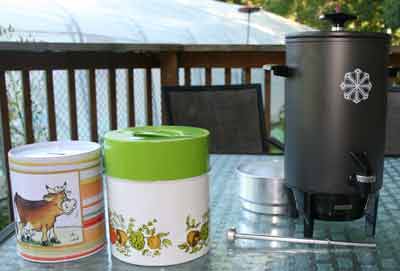
Unfortunately my good junk was severely reduced when I moved last spring so I went to the Salvation Army store and bought a couple of tins and an old coffee maker.
I tried to take the coffee maker apart but it was quite corroded inside and in the end I just left the heating element and bottom feet on. I managed to remove the spout and the handles.
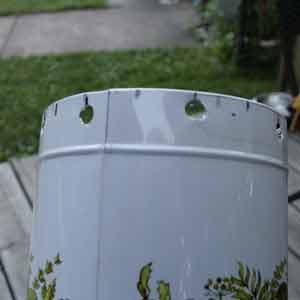
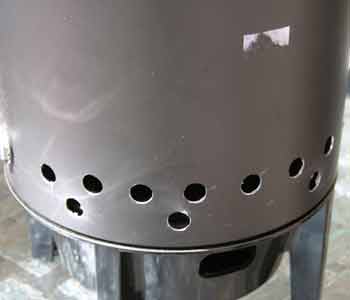
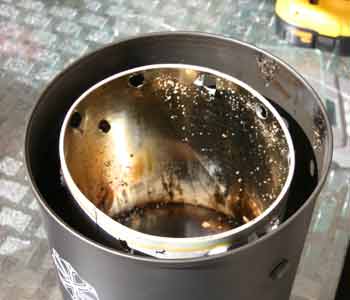
The 2 smaller tins fit inside the coffee maker and are narrower and shorter. I chose the green topped tin to start. After making holes in the lower part of the side of the coffee maker and along the top of the small tin I screwed them together with the smaller tin inside the larger coffee maker. I put the little legs back on since I had not been able to remove the heating unit. It did not matter since the bottom of the coffee maker did not really get hot.
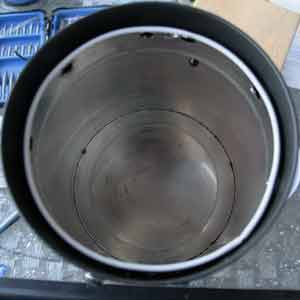
There is not a lot of space between the 2 tubes and I doubt that the air will get in very well.
Unlike a wood gas stove, the fire is started from the top and burns down. The fire started well but was hesitant and after it went out, there was still about 4 inches of un-burnt wood below the charcoal layer.


After the fire had started I covered it with a pie plate cover and a smaller top hole. This is a cook-top and a pan can be supported on little legs over the flames and the stove used for cooking.
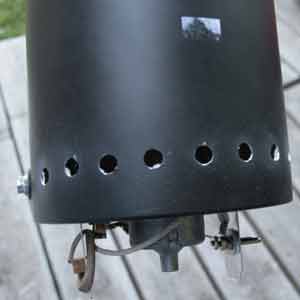
Back to the drill. I changed the tin to the narrower one which will allow more air flow. I also made more holes in the coffee maker, and more holes in the inner tin. This time the burn was much better.
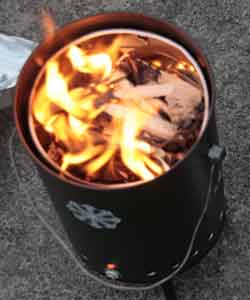
After starting the fire and letting it catch properly, I placed the aluminium pie plate with a hole cover and let it burn.
Flames were much lazier than in a wood gas stove and the burn slower. Flames are bluer and sometimes the flames just sort of hover around the air holes. There are no real jets as in the wood gas stove. Eventually the fire went out and only charcoal was left. I covered the tin completely so the charcoal would not smoulder and burn, and the next morning I had about half a tin of usable biochar.
WARNING, unlike the wood gas stove which is geared at increasing combustion by allowing lots of air, this stove deliberately reduces the amount of air available to the wood with the goal of producing both flames and heat that can be used for cooking and charcoal. One of the products is Carbon Monoxide. Do not burn this type of stove in the house or in a closed area. It is dangerous.
I used spruce wood which are cut offs from a carpentry project. I could have used any number of fuels including leaves or sawdust. This is for another experiment.
I now have charcoal chunks, I want to use it in my soil to improve texture and water retention as well as help maintain fertility.
email me: Christine

Biochar
Here is an English chap making a batch of charcoal for use in BBQ. It's very dramatic and fun to watch.
Creosote is a by product of some biochar production methods.
Wood Gas or Syngas is a by product of biochar production.
Biogas vehicle conversion factsheet from Ontario Ministry of agriculture. Refers to methane from manure etc but is closely related to syngas from biochar production.
International Biochar Initiative
Alberta Biochar Initiative
Canadian Biochar Initiative
US Biochar Initiative
Beware of biochar Initiatives An article which puts in doubt many of the premises of biochar use. It brings up the con side but not all claims are well supported. For that matter not all claims of biochar proponents is well supported either! Worth a read though.
Small Print
This information is for general knowledge. This reflects my ideas and experiments. I try to get reliable information from first hand sources such as research papers but at this point there is not a lot of real research about the value of biochar as a carbon sink. There is lots on the value of biochar as an agricultural additive.