

Steps in Building a SCAMP sailboat
Links to all my scamp building pages.
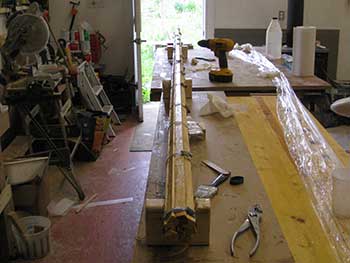
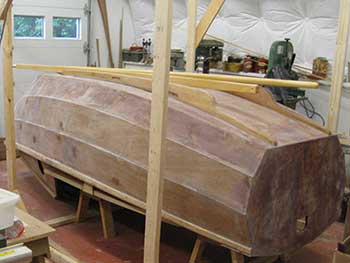
My SCAMP build, Making the Spars
The Scamp is rigged for a balanced lugsail. There is a boom at the bottom and a yard at the top.
I went shopping for wood for the spars. I was hoping to find some nice spruce 2 x 10 that could be cut down, but I was not very lucky. Nothing clear enough. The lumber is also quite wet and warps a lot.
There are lumber yards that will deliver good wood but the cost is high. I asked around for douglas fir but not much success there.
I've had good luck with pine. I made my Skerry mast from old shelves made of rough pine and it has survived very well. I had to do some joining and make the mast larger than designed but it has been a good mast and shows no sign of damage. I can get nice clear pine. It's not the strongest of woods but the grain is nice and there are no knots.
I eventually settled on a few nice boards and will laminate to get the thickness.
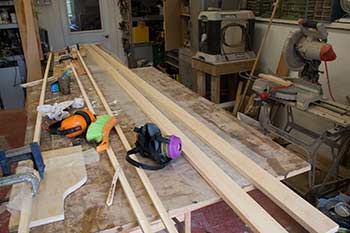
I cut my boards a bit larger than required and aligned the grain of the 2 pieces so they go in opposite direction to help avoid warpage.
The 2 pieces glued up fine but had a slight curl. Once glued this disappeared. I made sure to wet the wood with a generous amount of epoxy before gluing so the wood could absorb as much as it needed. I'm thinking this glue line will stiffen and strengthen the wood which is too week and bendy to be ideal.

I had wiped off most of the epoxy that had squeezed out so cleanup was simple. I used both the scraper and the sander.
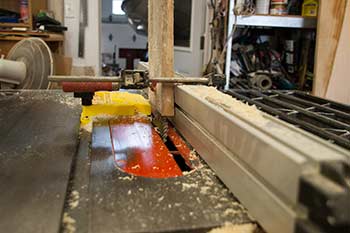
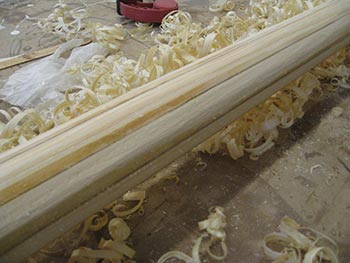
The boom tapers at both ends so I marked the taper and cut it. I used both plane and sander.
Tapers are cut and ends cut to size. After a quick check and sand I was ready to round over the edges.
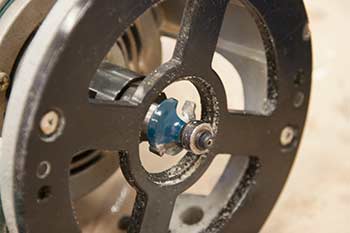

When I went to the last wood show, I had bought a new bit to round over edges. This is a quarter inch radius with a bearing. It worked very well to give the edges of the boom a nice round feel.

Next step was to give the spar a couple of coats of epoxy. I waited for the shop to warm up and applied lots of resin. Quite a lot soaked in. I was surprised on how much stiffer the spar was. I think it will work very well.
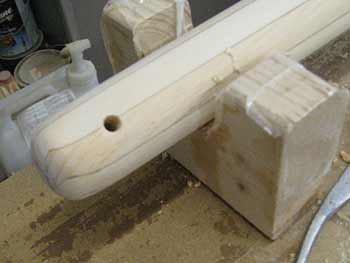
I forgot to drill holes at both ends so I guess I'll do that before I start finishing the boom. I intend to varnish it.
I'm trying to get my cutting and sanding done so I can start painting the hull. I'll have to do a major clean up and vacuum. I have no hope of eliminating all dust but I can get the lower surfaces clean so I don't stir up any when walking around.
Making the Yard
The yard, which is the upper spar, is longer and rounded. It is also quite thin and expected to bend some.
I decided to use a birds mouth construction. Not because I care about the weight reduction but because it is an easy way of getting a nice straight round spar from material that is not large enough, nor strong enough by itself, to make a solid spar. I know that the epoxy and laminations will help strengthen the spar.

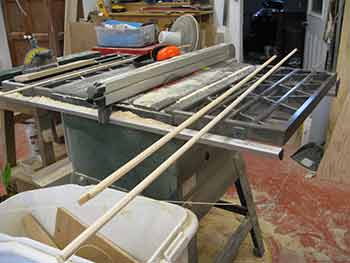
It was a simple job to cut the 8 staves and groove them. The wood is quite soft but the grain is good and there is little warping. I had to scarf a few extensions but that worked well. I cut the scarfs by hand using my Japanese pull saw.
I will cut some of the taper in the staves but the wall are so thick I will be able to actually thin the glued up yard when I round it. I'll put a core in the end sections to make sure there is enough wood there.

I took a bit of time to get set up. I checked each stave and sanded a couple of rough spots. I also made 3 half circular cuts to help support the spar as I glue it. My experience is that they are very floppy until you have them together and working alone can be tricky. These worked really well.
I dug up my pipe clamps, I had scored a box full from a garage sale. These I put together just a bit larger than the spar so I could just slip them on and not have to fumble to get them started.
I had spent some time making sure that my tables were level and that the little holders were level so that when I put the spar together it would be straight.
Since this wood is quite porous and light, it's pine, I mixed a batch of epoxy and pre coated everything so the glue would not be sucked up and my joints starved. A lot of resin got absorbed so that was a good move.
So far no tension or worries. When I start gluing I get a bit stressed out.
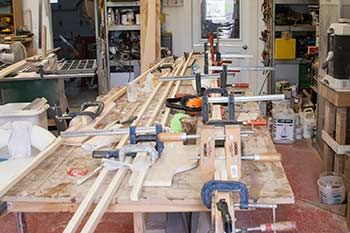
Finally I was ready. I mixed a large batch of epoxy thickened with silica and sawdust and smeared this on the v-grooves, and on the filler pieces for the end. I started assembly using the semicircular pieces. This worked really well to help keep the pieces together. I put 4 pieces together, inserted the core filler pieces and assembled the 4 last staves.
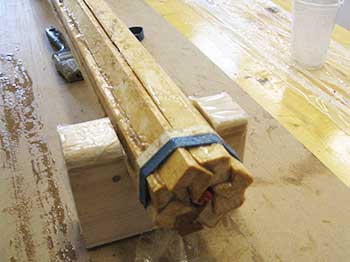

On my last birdmouth spar I figured out that I don't need to have the whole stave nicely aligned. All I need to do is make sure one end is secure. I used rubber bands to hold them together.
Once one end was secure I could go to the other end and line the wood up and position it correctly then put a rubber band on. It was then easy to check the middle part to make sure pieces had slid into place and if not to nudge them in position.
Once I was happy the staves were aligned and had clicked into their grooves, I went around and slid the clamps on the tightened them. I used the drill with a flat screwdriver bit.
First I roughly tightened the staves then I went over and re tightened them as epoxy had oozed out some.
The final step was to check that the yard was straight. I went over and cleaned up any squeezed out epoxy and filled a small gap.
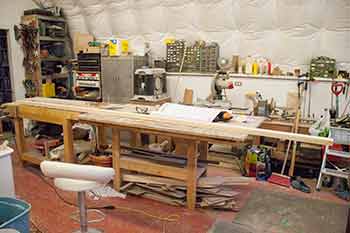
The yard is glued and I will be able to round it and taper it next, without worrying about the spar warping.
I certainly managed to get LOTS of epoxy on. Oh Well...

My poor plane took a beating cutting through the hardened epoxy. Silica filler is hard on the edge. It took me a while to re sharpen it. I have a garbage block plane but only one of the bigger kinds and I try to keep it in good shape.

For the final shaping I use a strip of sandpaper. It works really well.
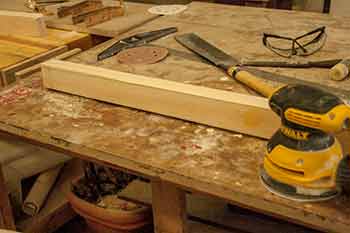
After the sanding, I cleaned up the ends, cut it to proper size, and made the holes.
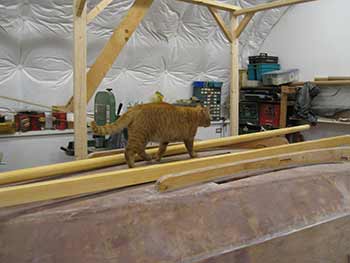
Monte the cat, the very same cat that bit me before we rescued him. I had to get emergency rabies treatment and a series of vaccines as a preventative measure.
He dropped in to check that the first coat of varnish was up to snif. I'll put the spars away and build up some finish on them and the mast when I start painting and varnishing the inside of the boat.
emails: Christine
This web site reflects my personal ideas and doesn't represent anyone else's point of view.
SCAMP envy/Lust This is a thread in the Wooden Boat Forum.
SCAMP capsize test Youtube Video.
Wikipedia Entry for SCAMP sailboat https://en.wikipedia.org/wiki/SCAMP_boat
Scamp sailing around in close quarters.
I find that a thickness planer is a really useful tool around the shop. I bought it when I felt rich but it's paid for itself by cleaning up less expensive wood.
I always wear a dust mask when I'm sanding or cutting. In the long run you are at risk of developing asthma or worse cancer. Many woods are slightly toxic and over time can really hurt you. Cedar is one of those woods. It's simple and cheap, wear a mask.
20 Pack Of 3M Particulate 9210/37021 Respirator Face Masks N95 For Paint Dust Mold
I also always wear a respirator while working with epoxy and while sanding just hardened epoxy. The epoxy is not deadly poisonous but it is to some degree particularly uncured or not completely cured epoxy and epoxy sanding dust. Get a better mask that is comfortable otherwise you will not wear it.
3M 62023HA1-C Professional Multi-Purpose Respirator, Medium
You never have enough clamps. Economy clamps. I have several and would buy them again.
Hooked on Wooden boats.com interview about SCAMP
Small Craft Advisor Scamp Forum
Detailed Blog of a Scamp Build from Small Craft Advisor Scamp Forum
I found having a smoothing plane is really helpful in mast-making. I know some people have used motorized planers but they work too fast for my comfort
SKIL 91002 Carbide Roundover Bit Set, 3-Piece
NORMA 01366704032-000-0541 Hose Clamps, 25 mm-40 mm x 12 mm W4 (Pack of 10)
I've added page on the tools you need to build a boat.
If you decide to build a boat be careful. These tools can be dangerous. If you don't know how to safely handle something find out. There are lots of forums out there.